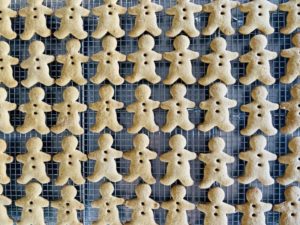
GINGERBREAD: GLUTEN FREE - VERSION 2
Author: Gina @ The Passionate Pantry
Prep time:
Cook time:
Total time:
Serves: 50 small gingerbread people

Ingredients
INGREDIENTS - DRY
- 240g white rice flour, or sorghum flour
- 100g potato starch
- 50g sweet rice flour (glutinous rice flour)
- 50g arrowroot or tapioca flour
- 1 ½ tbls ground ginger
- 1 tsp mixed spice
- 1 tsp sea salt flakes, or ½ tsp fine sea salt
- 1 level tsp bi carb soda
INGREDIENTS – WET
- 150g butter, cubed
- 150g golden syrup
- 100g light muscovado sugar, or plain brown sugar
- 1 x 60g egg
- 1 tsp vanilla bean paste
Instructions
METHOD
- Place all the dry ingredients into the TM bowl and mix 10 seconds / speed 4 to combine
- Add the wet ingredients and mix 12 seconds / speed 6, then knead 20 seconds
- NB: if the mix seems a little dry, scrape around bowl then knead for a further 10 seconds until mix comes together
- Place a large piece of Glad Wrap on your bench, upturn the TM bowl onto it to allow the dough to fall out … scrape around the base of the bowl with a spatula to remove the last of the dough and add that to what is on the Glad Wrap
- Use the Glad Wrap to lift over the dough and help shape it into a flattened rectangle
- Wrap the dough in the Glad Wrap and rest for 60 minutes in the fridge (it can stay in the fridge for two days before using if needed)
- Preheat oven to 160 degrees, fan forced, and line three to four large baking trays with baking paper (if you only have two trays you may wish to do the rolling/baking process in two lots to keep the dough cold for easier handling)
- Divide the dough into four so that you are only working with a ¼ of the dough at a time … as the dough is a little sticky, it is easier to work with in smaller sections
- Place a piece of baking paper onto your bench (if you have a silicon mat place the paper onto the mat as it will help keep it in place as you roll)
- Lightly dust the base piece of baking paper with GF corn flour and place the ¼ dough section onto it and press down with your fingers to lightly flatten it (you will need to continue to dust the bottom sheet of baking paper with cornflour as you roll each piece of dough, but whatever corn flour is incorporated into the dough from this process will not affect the flavour or texture, but this will stop the dough from sticking to the base baking paper when you are trying to lift your gingerbread shapes from it)
- Cover with a second piece of baking paper and roll dough to 4mm thickness (the gingerbread will rise a little with the bi carb soda in it, so try not to make the dough thicker than 4mm otherwise you may loose some of the gingerbread's shape)
- Carefully remove the top piece of baking paper and cut dough into desired shapes (dip your cutter into a small bowl of corn flour first, then straight into the dough to ensure you get a nice sharp edge … don’t worry if any corn flour sticks to the dough as it can be brushed off easily once the dough is baked)
- Use a palette knife or a thin spatula to lift the shapes and place onto the baking tray leaving 3cm space between each shape (dip the knife or spatula into the corn flour every now and then so that it doesn’t get sticky with lifting the dough)
- Collect the leftover dough and bring together into a disk before lightly flattening it with your fingers again, then cover with the second piece of baking paper again and continue rolling/cutting ensuring that you lightly dust the base paper with corn flour as needed
- Once you have got to a small piece of leftover dough, collect the next ¼ dough, press the leftover dough into the top of it, shape into a flattened disk with your fingers, cover with baking paper and continue with rolling/cutting until all the dough has been used
- NB: don’t worry about over-working the dough as it does not contain gluten and will not become tough with excess handling
- If you wish to create “buttons” on your gingerbread use a paper straw to punch holes into the gingerbread
- Place first tray into oven and bake 8 minutes, turn tray around and continue another 4 minutes until the gingerbread is lightly coloured around the edges (it takes exactly 12 minutes in my oven)
- Remove tray from oven and allow gingerbread to cool 10 minutes before placing on a cooling tray to cool completely
- Store in an airtight container for up to three weeks
Notes
For information on why I choose the GF flours I have, please refer to main post.
Information on where I sourced my flours from is also on the main post.
Information on where I sourced my flours from is also on the main post.
Recipe by The Passionate Pantry at https://www.thepassionatepantry.com.au/gingerbread-gluten-free-version-2/